Monday, February 12, 2018

Dresser to Buffet Makeover Video


Happy Monday everyone! I know it’s been awhile since I posted on here and I apologize! I’ve had a lot of other exciting things going on and haven’t taken the time to post.

I do have some news to share with you all! I crawled out of my little box and attempted to publish a video of a latest makeover. If you are like me, you enjoy watching a hands on, visual sometimes of something being done.This inspired me to do the same. I have always  thought someday I may do this but most of the problem in not getting it done is because of the fact that I HATE being in front of the camera. :(

I am still trying to get used to seeing me on a video doing my thing. I think to myself, do I always sound so bossy? What’s with all the hand motions and eye blinking? Anyway, I could go on about this subject but I won’t. Bottom line is, I had to overlook all that and hope that in doing this I can be an inspiration to someone to try a makeover of their own!

So, without more words, below is the link of my first video!

I usually don’t ask anyone to do anything extra besides step out and try repurposing of your own, but today I ask that if any of you has any requests of a video idea, let me know.. I may give it a shot! So feel free to comment on my channel or anywhere else to let me know if you want to see another painting technique or Silhouette Cameo tutorials, Home/garden tours, etc..

Also, if you like the video, share to friends and/or subscribe!

Again, bear in mind that it’s my first video..hopefully the future ones will get better! It’s also best to watch it in HD quality. (I loathe grainy videos and wish youtube would only display them in HD!)

So.. here it is!..

Paint and Glaze Tutorial

buffet pics1

I hope you enjoy! Thanks for visiting!

-Mary

Thursday, December 21, 2017

DIY Topiary Tree


Hi everyone! I have to share a quick tutorial on these little topiary trees I am making for table centerpieces at a family Christmas gathering. I know this is very last minute to be in time for Christmas, but I know some family Christmas celebrations aren’t until after the 25th, so maybe this can be of help for someone, or if you are just looking for cute little holiday decoration to be had, this might work!

I came across a similar topiary tree on Pinterest and don’t have the link, but I know it was Stonegable’s blog where she also shared a tutorial on making one.

So, here goes..

I bought all my supplies at Pat Catans. I was shopping for decor for two long, 20’ tables and like I usually do, I gravitated toward earthy, natural things..

IMG_0109

First I used wicker balls and sprayed them with snow spray.

IMG_0110

IMG_0118

I then stuck fake boxwood sprigs into the ball, gluing some of them down.

IMG_0120

IMG_0121

I then went outside and collected Hydrangea stems ..

IMG_0115

IMG_0116

I had some foam that I cut into chunks to put into the cups..

IMG_0122

IMG_0123

I stuck the Hydrangea sticks into the balls and glued the ends to hold.

After adding little foam ornaments and giving the “tree” another coat of snow spray, it was done!

IMG_0141

I added shredded “snow” to the cup, along with a few foam ornaments..

IMG_0151

IMG_0135

I hope you enjoyed this quick tutorial and are inspired to make some yourself!

Merry Christmas!!

-Mary

Monday, December 18, 2017

2017 Holiday Cottage Tour


Christmas time is one of my favorite seasons to decorate for! There’s nothing more cozy than flickering candles and twinkling lights on these long evenings.

I like to display snowy looking decorations so they will be fitting for the remainder of the winter season. I ended up spraying most of the greenery with snow spray, including the tree!

Following is a quick tour of our home.. enjoy!


IMG_0027

IMG_0031

I used Dollar General’s duster refills for the snowy string you see wrapped around the tree. I apologize for not taking any pictures of this process!

I bought a few boxes of these soft, dusters from Dollar General and cut each one in half length-wise. I then fluffed them up and glued them together to make a “snow rope.”

I made the bow out of burlap ribbon. I discovered I am not a very good bow maker. Trust me, you don’t want to see the underside of it! I was thankful for every pin I had on hand.

IMG_0035

IMG_0040

My favorite ornaments on the tree are these adorable owls and birds I found in Walmart for a good price. They are so adorable!

IMG_0038

IMG_0032

IMG_0090

IMG_0094

IMG_0050

Just bringing some of the outside in can add so much to a room! I use a lot of real tree and shrub clippings. Love the natural look and smell!

IMG_0043

IMG_0060

For the mantle display I used all natural shrubbery clippings form my gardens. The smaller evergreens I sprayed with snow spray.

IMG_0056

IMG_0062

IMG_0053

Gotta have some red plaid in the mix!

IMG_0046

IMG_0070

The above scroll is available on my Etsy shop. 


Moving on to the dining room..

IMG_0068

IMG_0085

IMG_0077

I got these little trees at a local market and added the dropcloth for a farmhouse look. I’m hoping I can get them to survive the winter, then plant them outside come spring. 

IMG_0075

Have a Merry Christmas everyone!

-Mary


Sunday, November 26, 2017

DIY Filing Cabinet Desk


Hello you all! I’ve been wanting to post about one of my latest projects for a while now and haven’t gotten around to it. So finally, here I am writing after midnight, since that’s when I enjoy it the most. :)

I hope you all had a great Thanksgiving! I can hardly believe we are in that time of the year again. To me, it seems like it just was! I’d be lying if I said I’m not already thinking about the next season, right around the corner, but for now, I will try and enjoy Ohio’s winter season, which can often be described in a few words, GRAY and a bit BLEAK. :(

Before getting into the topic at hand, I wanted to share my latest Etsy listings. I have a box of interesting books, old documents, checks, etc. from my great grandparents that I like to rummage through now and then. I found these cool old book pages that I felt were worth printing out. I thought they would make a neat vintage farmhouse wall decoration. You can view the listing here.

IMG_0817

And I also found some old books at a local thrift store that I used some illustration pictures to frame. You can see them on my shop here.

IMG_0780

I have also been busy creating scrolls and I am presently doing some research on different papers and sizes to use.

IMG_0989

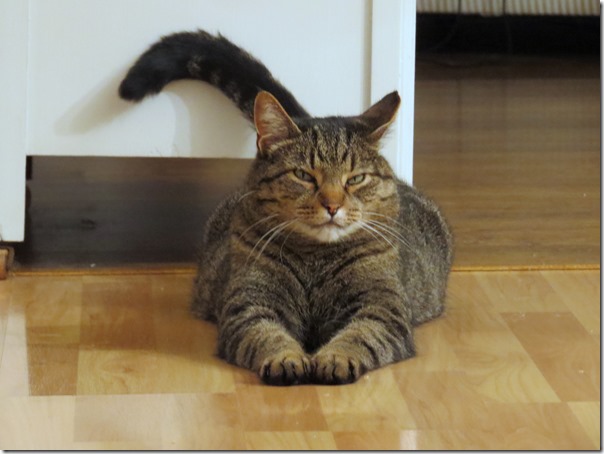
Here is Twinkle doing his best Sphinx impression as he watches me work..:)
IMG_0697

Now, for the featured project..

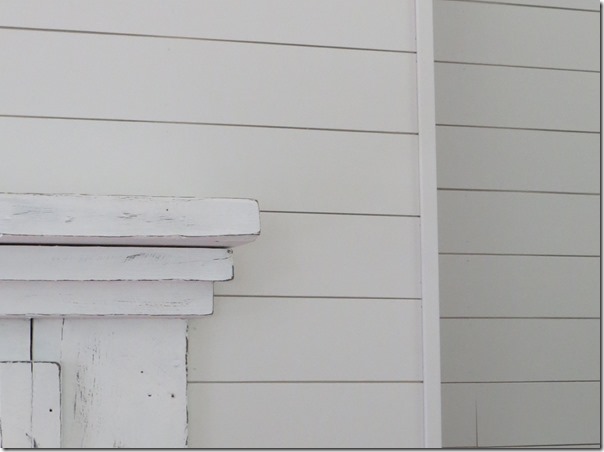
Starting at the beginning…this summer I added shiplap to a section of our living room wall, which you can read about here. 
cropped

Even though it’s in our living room, I had plans to add an office area along the one wall eventually. Sure, a nice big studio would be nice to work in with all kinds of space but for now it won’t happen so I decided to make use of the space I have.

IMG_0043

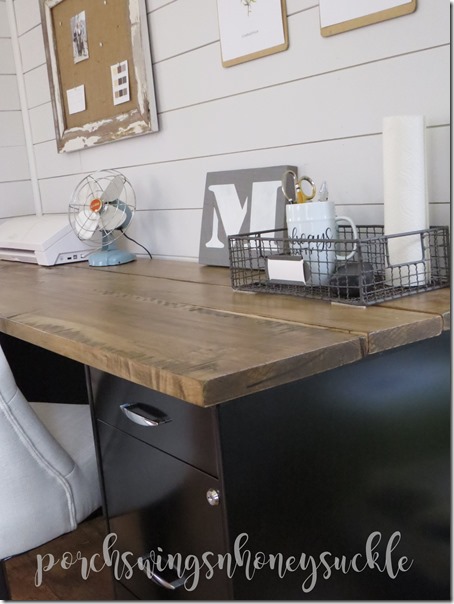
I wanted to remain as thrifty as possible with this project so I dug through my stock of wood out in the shop and managed to find a few nice, long boards to use for my desk top. I didn’t get a picture of how I fastened them together but I basically just used short boards and screwed them on the bottom side, holding the planks together.

IMG_0652

I had a little “end of the summer” visitor watching me as I stained the boards…

IMG_0651

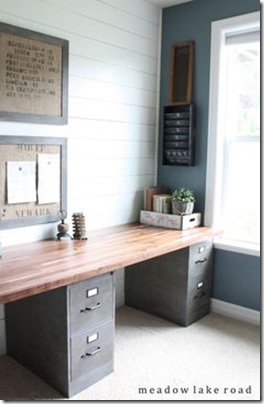
I got my inspiration from this pin on Pinterest..
desk

So, again, here is the “before”…

IMG_0043

And now the “after”…

IMG_1041

I spend a lot of time in this little corner! I do in home secretary work and also work on my Etsy designs here. I love it since it’s on the same floor as the kitchen, so I can multi task without having to go too far.

As you can see, I used three black filing cabinets from Walmart as the base. I was going to paint them gray and give them a “zinck” look as pictured in the Pinterest image but I haven’t gotten around to it. I still feel like they are too black but for now they will do.

IMG_1040

I am really attracted to the color charcoal, white and stained wood combinations these days so I tried to incorporate those three into this area. 

IMG_1027

IMG_1028

My youngest son, who is eleven made this pretty wood sign for me this summer. Doesn’t it fit in perfectly? :)

I was impressed how smooth I was able to get the planks, using only my little electric sander. After the top was stained, I gave it a few coats of Polycrylic, which helps with getting it smooth.
IMG_1024

IMG_1033

A scroll ready to ship out.

IMG_1042

So, all in all, I didn’t spend a fortune to get this much needed space set up. The biggest expense would have been the filing cabinets, which were around $40 each. Coming in second is the chair, which I ordered from Amazon for around $110 for a set of two. The lights are from IKEA and I believe they were $20 each. I won’t count the wood since it was just left over from a former project. All the wall decor I made spending next to nothing.

I hope I can inspire you to create things using what you have, or spending nearly nothing, but still getting something useful out of it! It’s a good feeling!

Thanks you all for visiting my blog and I hope you are having a great day!

-Mary