Sunday, June 11, 2017

Paint Can Planters


I’ve always cringe a bit when tossing empty paint cans into the trash. I always have this feeling more could be done with them. After all, they have that charming, almost vintagey look, with their silver color; speckled with a few rust spots, and cute handle. But mine of course, are usually dripping with paint down the sides. Who wants to clean that up?

The past few days I have been fixing up a few flower pots for the upcoming Vintage Fair. I need something to dress up my booth and what better way to achieve that than with nature’s colors?

This was my set up in the basement. (I know, I’m strange like that, using the floor as a work space:))

IMG_8886

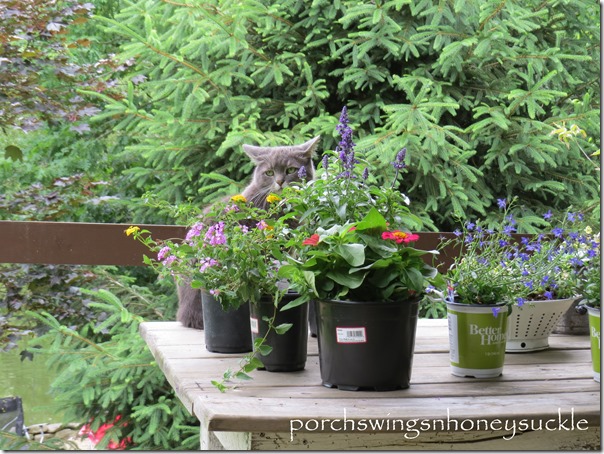
After they were planted, I set them outside on a table, where instantly lil miss Pebbles made herself at home. :)
IMG_8890

IMG_8891

After fixing all these arrangements, I realized I still needed a few more pots. With all the painting I’m doing these days I decided to scrub a few empty paint cans and see how they would work.

IMG_8894

I decided to paint one of them white and do some mod podging on the other. I masked off the handle with tape since I wanted to keep it silver. I then spray painted it a satin white using Rustoleum brand spray paint.

IMG_8895

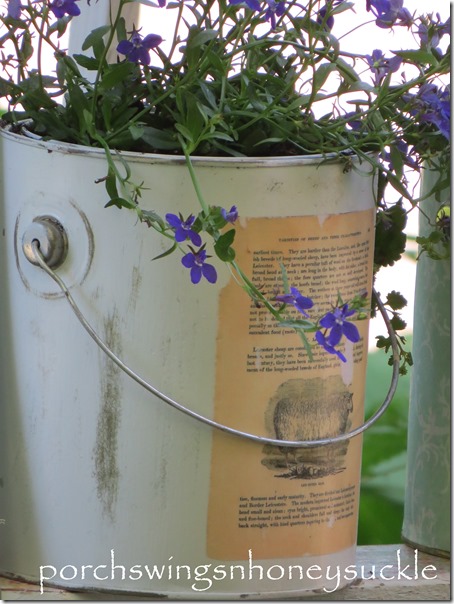
For the other one, I cut a vintage style scrapbooking paper in strips to fit around the can..

IMG_8897

IMG_8898

I cut out circles where the handle would be and applied mod podge to glue it into place.

IMG_8899

I always have issues when using regular weight paper that I get wrinkles in it. For this project it will be ok, but it can be frustrating when I really don’t want any there. I think I remember reading somewhere that if you lightly mist the paper before applying the mod podge, it will help with wrinkles.

For the cans, I wanted to add an old looking label of some sort to them. I have this cool box that came from my great grandparents, that is filled with old letters, documents, books, etc. It is quite interesting to look through and see how little things cost back in the early 1900s! I use a lot of symbols, pictures, etc. out of that box for some of the things I design.

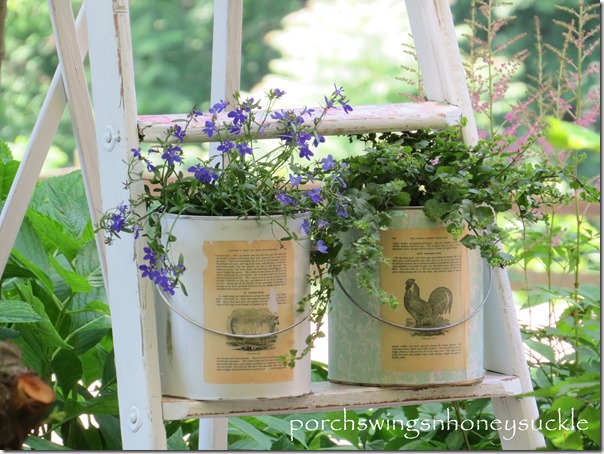
I opted to use a few pages of an old book for the cans, giving them a farmhouse look..I scanned and printed them out..

IMG_8900

I mod podged these “labels” onto the cans. After the coat of glue was dry, I sanded the cans, labels and all, and applied another coat of mod podge.

As a final step, I drilled holes into the bottoms, since I want to use them as flower pots..

IMG_8901


This is the final result..

IMG_8913

IMG_8920

IMG_8922


A closer look..

 IMG_8927

IMG_8926

IMG_8916

I really enjoyed this project and I’m sure it won’t be the last time I’ll be re-purposing paint cans!

You may have noticed the ladder in the picture? It is also a mod podged project that I worked on the other day.

IMG_8936

All these items will be available at the Vintage Fair on June 24th. Hope to see you there!

Thanks for visiting..

-Mary

Friday, June 2, 2017

Antique Chest Makeover


Once in awhile I will go to an estate auction, and every time I do, I think never again. First of all, it’s so hard to find a good bargain. I feel auctions are over rated in our area and that’s what makes it difficult to snag a good deal. After battling crowds of people and barely being able to see through all the sea of old men in overalls, the item is sold. And the few times I manage to make myself noticed and actually buy something, I can feel funny looks as I hold up my buyers number. I’m sure they’re all thinking what ever will she do with that piece of junk? After all, the things I buy usually look like junk, since that’s all I can afford. But, really, I don’t care as long as the bargain is worth it.

So it was that last Fall, I did manage to snag this old chest for a few dollars..

IMG_8573

I was fairly rough looking, with pieces of the molding falling off. I removed it all and made quite the mess while doing it, but it needed to come off..

IMG_8574

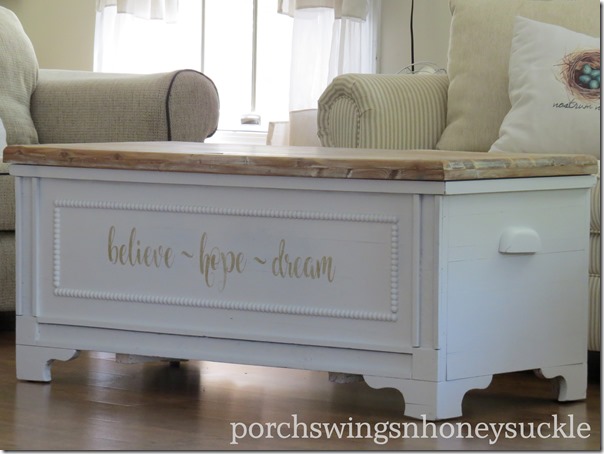
I sanded everything really well and gave it two coats of Spectral colored paint. I love how natural wood and white look together, so I left the lid the natural wood color. I also added a few words of inspiration on the front. So, here is the after…


IMG_8813

Looks pretty different, doesn’t it?

IMG_8818

Definitely worth the overalls, pot bellies, and funny looks. :)

IMG_8819

I decided to do the letters in gold paint instead of my usual black.

IMG_8820

Again, loving the combination of natural wood and white.

This piece will be at the vintage fair, so if you need a coffee table or a seat with a bit of character, this may be for you! Hope to see you there!

~ Mary

Wednesday, May 31, 2017

End Table Makeover


I can’t believe we are in June already! Seriously, how does the time go by so fast? I enjoy this season so much and would love to hit a pause button!

I apologize for not posting more often on here. I have been so busy with a number of things which I will do a quick photo tour of..

 A huge deck renovation we have going on..

IMG_8763

Not the best picture, but you can tell the railing is missing and the floor is stripped, waiting to be stained. We also installed a new front door, which I love! (I feel lucky to have a hubby that works with doors, enabling us to get them for a good price.)

Getting ready for the vintage fair.. 

IMG_8630IMG_8633

IMG_8639IMG_8576


Gardening…

IMG_2471

And of course doing the usual fun spring time activities like sitting around the fire, fishing, walks, etc..

IMG_8365

IMG_8430

Not sure what’s up with the broom? :)

This is our lunch time view at times during these beautiful days..(gotta take time for this too :)

IMG_8655

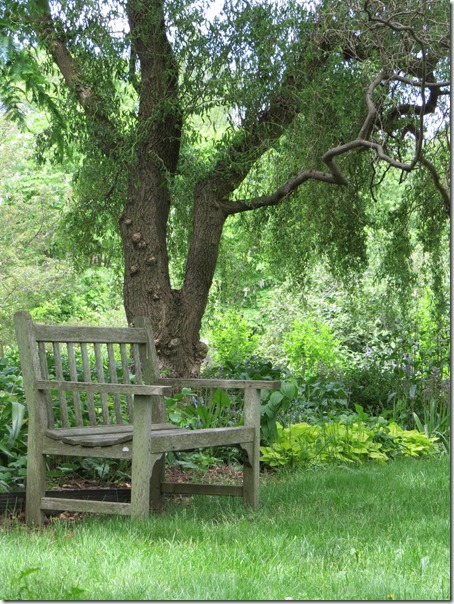
I also spent a day last week with mom and sis at Kingwood Center. What a beautiful place! We had visited in the past, but not the last few years and it was great again to walk through acres of beautiful gardens, huge trees, park benches, old buildings, fountains, and the list goes on. I took a lot of pictures, so I’ll only share a few…

IMG_8686

IMG_8731

IMG_8735

IMG_8748

IMG_8740

I could have sat here all day!

---------------------------------------------------------------------------------------------------------------------------

Now, on to the end table makeover!

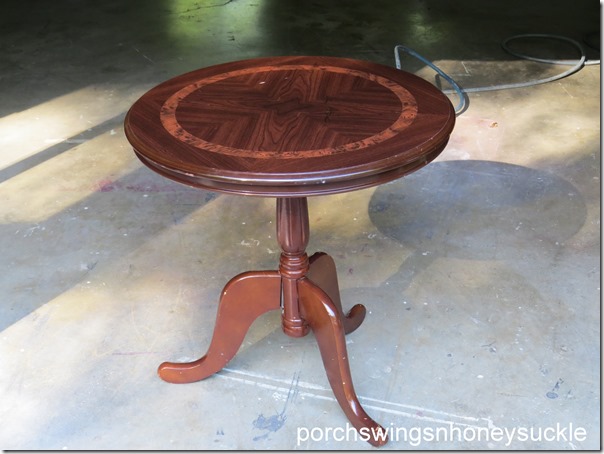
I got this table from someone awhile back and finally got around to doing something with it.

IMG_8572

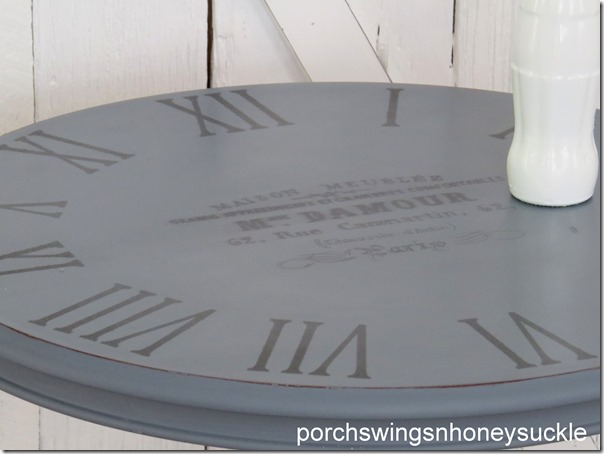
I gave it a coat of gray paint and designed a Roman numeral, French style clock on the top. I used my Silhouette Cameo for the numerals and parchment paper for the center. I know there’s all kinds of tutorials out there on how to get all the numbers nice and evenly set apart, but being in the usual hurry that I was, I just gave it a shot by guessing. It’s not perfect but it will work..

IMG_8769

IMG_8771

IMG_8784

IMG_8786

After adding the design to the top, I applied wax to give it a smooth, protective finish.

IMG_8779

The table will be available at the Walnut Creek Vintage Fair on June 24th. Mark your calendars, it’s coming up!

Have a great rest of the week, you all!


--Mary-----

Monday, May 8, 2017

Makeover Monday–Spectral Paint


Today I will be showing you before and after pictures of two pieces of furniture I painted for people recently using Spectral colored paint. I cannot keep enough of this paint on hand! Some may say white is white, but with all these years of painting I have discovered that it’s not. There are many different shades of white. Spectral is a nice gray/white color. It has so little gray in it that you may not be able to see it without holding a stark gray color beside it. It is presently one of my favorite colors.

I redid a hutch and chest recently using Spectral colored paint. Here are the before and after shots..

IMG_8406

IMG_8407

IMG_8446

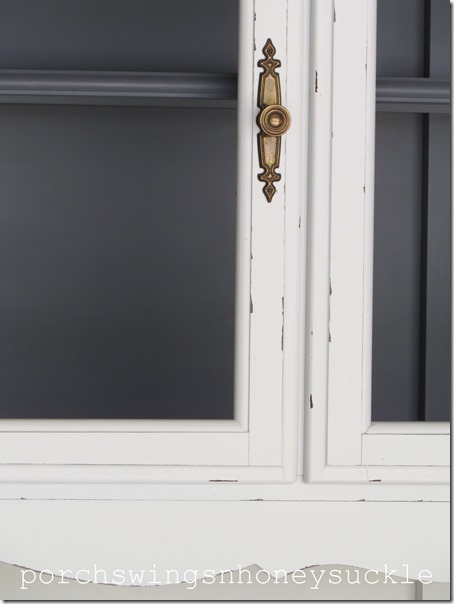
It is difficult to see the exact shade of white in a picture, but at least you can see it received a major transformation. The inside is painted with a dark gray paint that I’m not sure of the name anymore.

IMG_8447 

The owners want to change the hardware yet, so that will add a nice, modern farmhouse look.

IMG_8448

IMG_8450

I used my sprayer to apply the paint and since there is a primer in the paint already, I didn’t apply one separately. With a lot of old pieces of furniture like this, I ran into old stains creeping through the paint. To solve this, I started using gray Rustoleum spray paint primer. It works great, giving it a light coat that will blend in perfectly with the paint I apply using my sprayer. I only applied this spray paint where the stain came through, not over the whole piece. After it was dry, I them resumed spraying the white water base paint over it.

IMG_8445

After the paint was nice and dry, I distressed the edges and gave the piece a coat of Polycrylic, using my sprayer. I am a strong believer in using Polycrylic to protect the painted finish on most pieces of furniture. I always buy Minwax’s Polycrylic, but there may be other brands out there that would work too.


Here is the other piece I did at the same time..

IMG_8408

The only prep work I did on both these pieces was going over them with Krud Kutter, a deglossing/cleaning product. (I love this stuff) At times I will sand a bit too, but for these pieces it wasn’t necessary.

For this chest, I didn’t want the grooves to get any paint, so I rolled up masking tape and stuck it into the cracks before painting.

IMG_8417

After a few coats of Spectral paint..

IMG_8455

IMG_8457

IMG_8453

After the paint was dry, I distressed the edges and gave the whole piece a coat of Annie Sloan wax.

I believe the owner is planning on adding a cushion seat, which will look great. For me, I’d probably either paint the hardware or get new ones, though it looks better than I expected with the brass too. I love the look of the fake drawers and am planning on incorporating that idea into a piece of furniture eventually. :)

I hope you enjoyed this Monday makeover and are inspired to redo old, unwanted pieces of furniture. It’s truly amazing what paint can do!

Have a great week!

-Mary

Saturday, May 6, 2017

Springtime Blooms


Whether it be a colorful bloom or

a sprig of green grass,

it will bring cheer into ones heart,

reminding us what the dawn of spring

will bring forth.


Okay, I’m not a poet by any means, but isn’t this true? There’s nothing more cheerful than a fresh bouquet of flowers on the table or mantle. In the spring time I always vow I will keep all my vases filled with bouquets of lovely blooms through out the growing season, but of course I don’t always get it done.

The last several weeks we have been blessed with trees and shrubs just bursting forth in blooms, so I did manage to bring a few of them inside for all to enjoy..

IMG_8387


IMG_8301

The above blooms are from a wild apple tree in a nearby field. My son and I went for a walk one day and discovered this tree that was extra full of blooms. It seemed like we were in another world as we walked underneath all the pink and white flowers. I think my love of nature does rub off a little on the boys because the youngest still talks about that magical place. You can’t see the blooms in the picture, but this is what I found when I caught up to him..:)

IMG_8357 

The same boy brought me these flowers recently, all fixed in a jar..

IMG_8405

I was quite impressed. I told him he’s much better at fixing bouquets than I am. I heard him rushing about, going through the cupboards, looking for a jar, all in under a minute, and bam, a bouquet was created. :)

I cut off some Dogwood blooms for the mantle..

IMG_8345

IMG_8392

The old window sign on the wall is something that will possibly be sold at the vintage fair this year. I thought I’d use it until then for a mantle decoration. I made it using my Silhouette Cameo. I’m still planning to eventually post a little more about that amazing machine and some tips I’ve learned along the way, and am still learning. :)

I also have an idea for the fireplace wall that will hopefully happen sometime this summer. I haven’t run it by hubby yet, but will soon. I’ll probably start out by mentioning something major of an idea I have, like knocking out a few walls, or adding an addition to the house, then I’ll say or we could just go for installing shiplap on the fireplace wall…? Worst case scenario first, then the actual idea will seem so minor. Winking smile No, really I kid about it.  We are usually on the same page with projects, thankfully! He likes a new look too.


I hope you all are enjoying this spring!

-Mary