A few weeks ago I got talked into painting a kitchen for a couple who saw my post on here from a few years ago, Paint and Glaze Cabinet Tutorial, and wanted their kitchen done the same way.
Although I am not usually painting for others at this point, I had a hard time saying no. I learned a few things by doing this kitchen; a few paint related tips that I want to share with you here, and I was also reminded again of why I’m not painting full time for others anymore. :) Although I enjoyed doing this project very much and meeting the wonderful owners of the kitchen, I wouldn’t want to be doing this full-time for now.
I don’t think I have ever painted anywhere that the people were so organized! I was truly inspired! Everything was neatly cleared from the counters and when it came to glazing the cabinet frame,which can be a bit messy, shelf paper neatly covered the countertops, making the work so much easier.
Wes, the owner, took off all the doors and removed the knobs and pulls from the drawers and doors. (everything was carefully sorted and bagged making it easy for him to put it back on, I’m sure)
On the first day of this job I gave the frame part of the cabinets two coats of paint, using a bristle brush and a little roller, wherever I could.


In the past, whenever I did a paint job, I would generally pick out the paint for the project, but this time the owners had it all ready for me. I had never used this kind of paint before and was a little nervous about trying something new, but ended up really liking it. It’s a white, semi-gloss, water based paint.

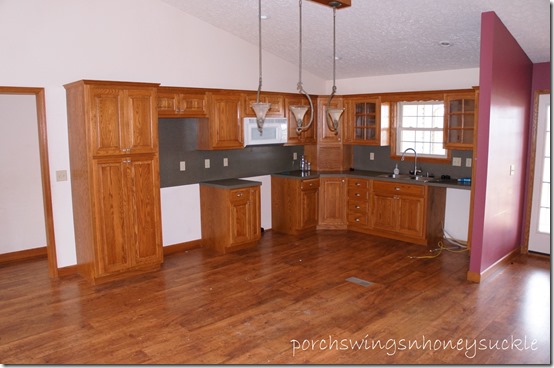
Here is a before picture of the kitchen that I got from the owner, before he took the doors off..

Here is the picture I took right before giving the frame two coats of paint…

Here is a picture of the kitchen when they bought it. You can see how much they have improved it already with the tile backsplash (which Wes did himself), new counters, and fresh paint on the walls. They also added an island which you can see in later pictures.
On the next couple of days I worked on the doors and drawers at home. First I gave them two coats of paint, using my sprayer. This step can also be done by applying the paint using a brush and roller.
I didn’t sand any of these surfaces before applying paint but depending on how shiny or smooth wood is, I would generally sand a little, just to get the gloss off. These cabinets are oak and usually oak is okay without much sanding.


It’s hard to tell with poor basement lighting, but after the two coats of paint the doors and drawers were nice and smooth, ready for glaze. They would also have looked great with just the pure white paint like this.
I ended up getting the glaze, which was surprisingly hard to find. I was disappointed that the local Ormes hardware discontinued the kind I’ve used in the past. Presently they don’t carry any. I stopped in at a Sherwin Williams store and actually got a funny look when I asked for glaze. :/ Finally a helpful guy from the True Value hardware store in Millersburg knew what I was talking about.
This is what I ended up with..

For those of you who aren’t sure what glaze is (tune in, Sherwin Williams guy) it’s a clear product you mix with paint (the color of your choice) and it gives you more time to work with it versus pure paint. You can mix in however much glaze to your paint as you want. The more glaze, the more working time before it dries. For this job, I went half and half.


The paint I used was a water-based satin paint. The color is one I’ve used a lot for a nice, dark brown, called Espesso Bean. (I believe it’s a Do It Best color)
Generally the rule with glaze is you apply it to the door or drawer using a brush or rag, and then rub it off while it’s still wet. Whatever sets in any grooves or crevices,stays. But, I always think with raised panel doors, it adds so much more character to apply a line of glaze on a few of the outer raises, using a straight foam brush. This does take A LOT of time but I think it’s worth it, plus I knew for this job, the Keims wanted plenty of glaze.
Following is a step by step that worked pretty good. I’m sure there are other ways of doing this but here’s what worked best for me…
I started out by applying a thin line of glaze on the outer raises, a place that would be wiped off, if not applied intentionally.


For this certain raise, there were two places that I did this, all the way around.
Then I let it DRY! This is pretty important. If it’s not dry, and you proceed to the next steps, you will end up rubbing it off.

The next step was the edges of the door. I applied the glaze on all four edges, then wiped off using a dry old t-shirt rag.
I also had a wet rag (also a t-shirt) handy, incase I needed to wipe more off once it had started to dry. Never panic because all the glaze can be wiped off if need be, even once it’s completely dry. If a wet rag doesn’t do it, mineral spirits will.
The next step was the inner frame. This was my favorite to do. I generously applied the glaze to that crack all the way around and then wiped it off. It left the straightest line if I wrapped the cloth around my thumb and kind of wiped along the raise, holding my thumb at a same angle all the time. (Hopefully this is making sense for those of you wanting to try it!)
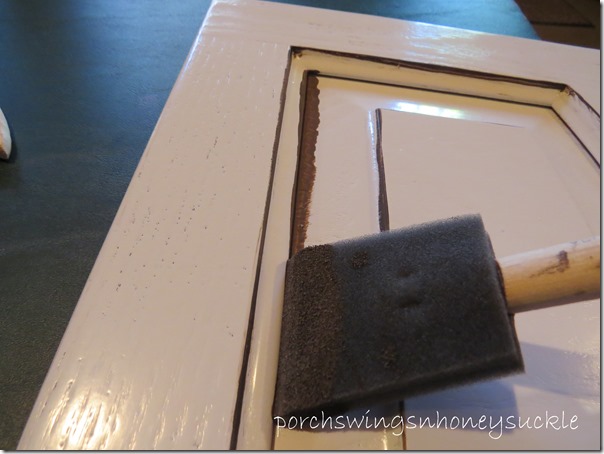


I then used the wet rag to wipe off any unsightly smears.
At this point here’s how it looked…

I didn’t dry this step before proceeding to the next one, though you could, just to make sure you don’t smear that line of glaze in the groove.
The next step was the outer frame…

After wiping that off, I did the inner middle part…
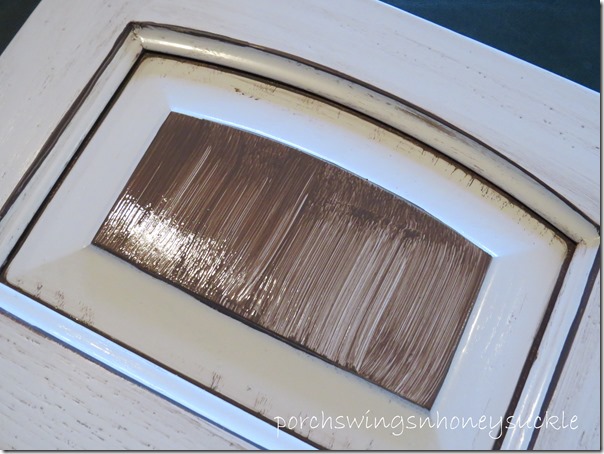
When wiping off large areas, it’s really important to wipe in straight lines, going with the grain of the wood.
The last glazing step was made easier for me by using a rag to apply the glaze. I dabbed the rag into the glaze and rubbed it into the inner frame part.


The finished door…
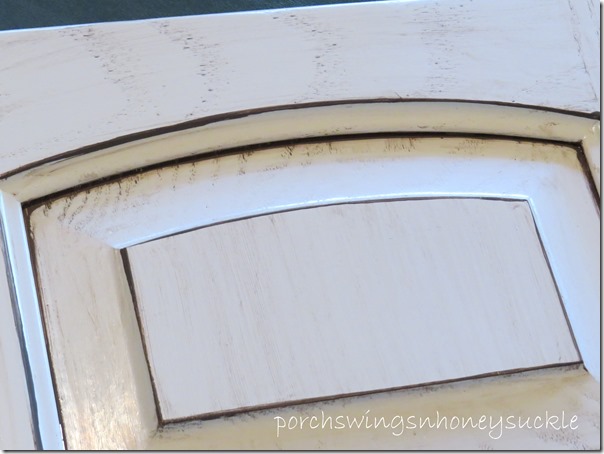
Again, with this lighting it’s hard to see the details. Basically the color on the door went from pure white to an off-white.
After the glaze was completely dry, I gave the doors and drawers a good, thick coat of Polycrylic, by Minwax, using my sprayer. I used a satin sheen polycrylic. This step could also be done with a brush and roller.
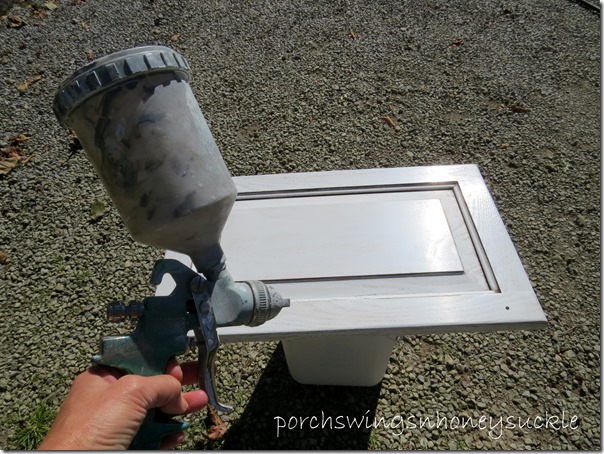
After glazing the frame part of the cabinet I also applied the Polycrylic.
Here are a few close up shots of the finished doors..

Again the before of the kitchen…

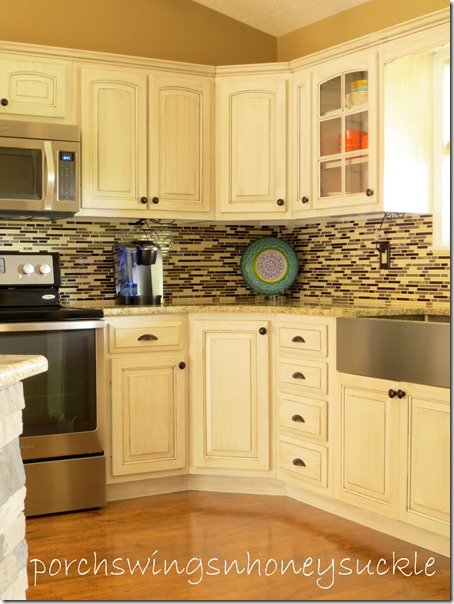
The after…

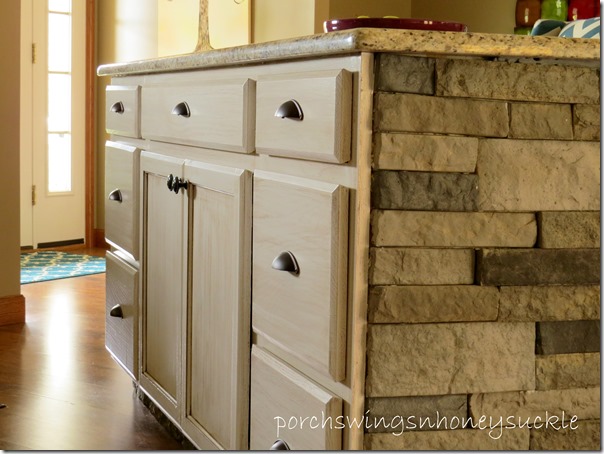
Love the island! They also did this on their own, lining the three sides with stones.
It is amazing what paint can do! I still marvel every time I paint something!

If you are debating whether to paint your kitchen or not, I hope this post inspired you to go for it! Believe me, it’s so worth it!
Thanks for visiting & have a great Monday!
-Mary