Wild - living in a state of nature and not ordinarily tame or domesticated
wonderful - exciting wonder : marvelous , astonishing
I couldn’t think of a better way to describe what I got to spend time with over the weekend! He really is marvelous! No really, I probably wouldn’t write a blog post on the wonder of hubby. (though I probably could… but I’ll spare you  )
)
We spent a few days in the Alleghenies celebrating our anniversary. It probably wouldn’t be just anyone’s idea of an anniversary celebration but for us, it’s what we love to do! The boys weren’t in the least bothered that they wouldn’t be going along. They have some bad memories from a few years ago when we hiked up Black Rock Mountain on a 100 degree day with a water shortage. I won’t get into that…
When we decided a few weeks ago to go hiking, we looked online for different trails in West Virginia. We preferably wanted to do a loop so we wouldn’t have to back track. Finally we found the “perfect” one. It was called Pond Run White Rock trail. The review said it’s a very difficult hike and only experienced hikers should attempt. We smirked a little and thought it was likely written by an out of shape, wanna be hiker. (yes, unfortunately we have an attitude at times on such matters as these) The review said the loop is about fourteen miles and would take at least a half day. This was the hike for us!
I hurriedly printed out the written instructions and a little map containing only the shape of the loop, which we later discovered quite useless. At the time we thought the written instructions were all we needed. We were ready to go!
On the way down we stopped at a few garage sales and I of course had to take pictures of every old car and barn we saw along the way. Here are a few of my favorites…


We ended up staying in Frostburg, Maryland in a motel with a beautiful mountain view.
The next morning we headed for Wardensville, WV where we would find the trail head.
Finally, we were off! For the first few miles the trail looked like this…!

This was definitely the strenuous part of our hike and probably why the trail was rated as difficult. We were thankful it was at the beginning and not at the end of our journey!
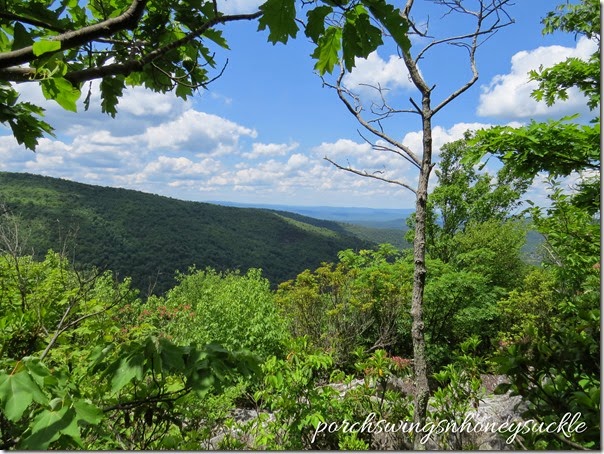
I could hardly get enough of the crystal clear mountain streams, huge ferns and majestic mountain views!



The mountain Laurels were abloom…

At this point we were still happily hiking along, chatting as we went and me oohing and awwing at the cute wild flowers, birdsongs and trickling springs.
There was always a little nagging feeling in my mind how our “map” of written directions didn’t always quite make sense. For example, our directions said “at first intersection, take white spur trail to Half moon lookout” We never saw Half moon lookout or white Spur trail. We later remembered the intersection as being the one where we saw our first humans. They were decked out in trail gear with hats, huge back packs and metal walking sticks in each hand. We said hi and pretended to know where we were going as they debated which of the five trails to take. We took the blue blaze trail, since point five in our awesome directions said stay left and take blue blaze trail. We thought it’s a little soon to be at point five already but oh well, the sun was shining, the birds were singing and life was good!
We are still wondering why the trail name had “white rock” in it. We never saw white rock lookout, as stated in our directions, or any sign saying “white rock.” As we walked and walked we started to wonder why the sun was in the wrong place, since we should be making a loop the sun wasn’t where it should be, we thought.
We had a major simple moment where we came to a wooden post with a map under glass on it. It was a nice, detailed map of the trails in the area. The Potomac hiking club had provided it. We studied it for a while and thought how absolutely awesome it would be to have a copy of it! It was so much better than our pitiful written directions we had that made no sense. John kiddingly said maybe he could do a karate move and smash the glass to get the map. I laughed and looked on the back of the post as my Canon Powershot sx50 camera that hung from my neck all day, brushed against the post. I looked for a box that might contain maps, like some of them do, but there was nothing there. We would have to do our best to try and memorize every little intersection and bend, after all what other option did we have? (rolling eyes right now)
The map and the directions simply did not match up. We were more confused than ever and finally came to the conclusion that the map was zoomed in so much that we were seeing only a small portion of our “loop.” Surely soon we would loop around…
We continued on. The chit chat died down. I thought back to when I packed for this trip, how hubby laid out a flash light,a Leatherman and rubberbands(don’t ask me why) and told me to pack those for sure in his backpack. I snickered a little and told him we’re going on a half day hike, why we would need a flash light? But I packed them anyway.
As we were walking I began to laugh out loud ( I was tired & a little hysterical) when I thought of why I had to pack rubberbands. ( the flash light & Leatherman didn’t seem so funny anymore) I got this picture in my mind of a bear creeping up on us and hubby frantically digging through his pack for the rubberbands to shoot at the bear. Okay... at the time it was really funny. I didn’t do it to tell him what I was laughing about. I guess I felt it was too soon to share, that I’d wait until we were safely on the way home, if it ever came to that!
After what seemed like many miles more, we came to another sign with a map. We studied and debated a while. At this point, we thought of back tracking but we knew we wouldn’t make it to the car before dark. The thought did enter our minds that maybe we would end up sleeping out there. We each had a bottle of water left and some jerky, trail mix, etc. but nothing else to equip us for the night. (except maybe the flashlight, I admit)
We trudged on. After another half mile or so we both decided this is enough. That not knowing quite where we going to end up just didn’t get it. We turned around and headed back to the last sign with the map. We studied it thoroughly and figured out a route to where we thought the car was. Once again, with the camera still around my neck, we memorized every little trail intersection so we would be sure to take the right trails.
According to the map we probably back tracked around four miles of pretty rough, rocky terrain. We were both starting to feel our joints protesting but we didn’t have much choice than to keep walking.
Finally we came to that first post with the map. As we studied it again, hubby saw the light. “Help, we could take a picture of the map” We just looked at each other, both almost embarrassed that it took so long for this thought to occur. 
After we came to a pink blaze trail the going was great. The trail looked like this and was mostly down hill…

The only thing slowing us down was hubby stopping every once in a while and picking ticks off of himself. He picked off dozens and I never had one. I thought that was a little funny. I’ll have to do a research on what attracts ticks.
The trails made sense after we had a map to go by. We did end up at our car again before dark, but it was close enough! We calculated that we probably hiked at least 18 miles or more. Definitely a little more than our original intentions! But we had fun and would do it again, maybe next time with a map or a least a picture of one!

I did a little research later on the trail we were on and where it ended up. The total length of the trail is 225 miles and it goes all the way to the Appalachian trail in the heart of Virginia! Maybe about now we would be there, had we continued.


After the hike we were both so sore we could hardly walk after sitting for a while. It carried on into the next day but after that it was better, thankfully!
Thanks for hiking with us!